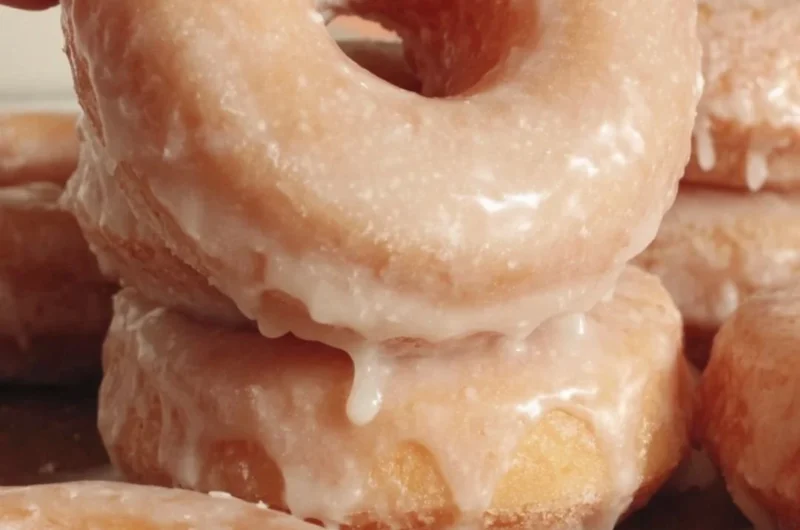
Homemade Glazed Donuts
There’s a warm sense of nostalgia that washes over me every time I think of homemade donuts. The gentle aroma of fried dough, the anticipation of that first bite, and the soft melt-in-your-mouth sweetness paired with a creamy glaze remind me of early Saturday mornings spent with loved ones around the kitchen table, laughter mingling with the scent of breakfast delights. These Homemade Glazed Donuts carry that charm – they’re not just a treat but an invitation to create memories. Whether it’s a cozy weekend breakfast or a sweet snack to brighten up your day, making these tender, golden donuts from scratch is an experience you won’t forget. Trust me; this is one you’ll definitely want to pin for later!
Why You’ll Love This Recipe
- Easy to Make: With simple ingredients and straightforward steps, perfect donuts are within reach, even for novice bakers.
- Warm and Cozy: The blend of flavors and textures creates a comforting experience that wraps you in warmth.
- Family-Friendly: Making donuts is a delightful activity that everyone in the family can participate in.
- Customizable: You can easily switch up the flavors and toppings – there’s something for every palate!
- Perfect for Any Occasion: Whether it’s a Holiday brunch or an everyday treat, these glazed donuts fit right in.
What You’ll Need
Gather These Simple Ingredients
- 3/4 cup water
- 1/4 cup bread flour
- 3 cups + 2 tablespoons bread flour (See notes below for measuring)
- 1/3 cup granulated sugar
- 1 tablespoon instant yeast
- 1 1/4 teaspoon fine sea salt
- 1/2 cup whole milk (room temperature)
- 1 large egg (room temperature)
- Tangzhong (from recipe above)
- 5 tablespoons unsalted butter (room temperature)
- Neutral oil, for frying (like canola, vegetable, or avocado oil)
- 3 1/2 cups powdered sugar
- 1/3 cup + 1 tablespoon hot water
- 1 teaspoon vanilla paste or extract
- Pinch of fine sea salt
Let’s Make It Together
Step-by-Step Instructions
Make the Donuts
In a small saucepan, combine the 3/4 cup of water and 1/4 cup of bread flour. Cook over low heat, stirring constantly until it thickens into a smooth paste. This is your Tangzhong, a technique that ensures super fluffy donuts. Set aside to cool slightly.
In a large bowl, mix the 3 cups + 2 tablespoons of flour, granulated sugar, instant yeast, and fine sea salt. Create a well in the center and add the whole milk, large egg, and cooled Tangzhong. Gently mix until combined.
Add the softened butter and knead the dough on a floured surface for about 5-7 minutes until it’s smooth and elastic. Place it in a lightly oiled bowl, cover with a clean towel, and let it rise in a warm place until doubled in size, about 1 to 1.5 hours.
Once risen, punch down the dough and roll it out on a floured surface to about 1/2 inch thick. Use a donut cutter to cut out your donuts and the holes in the center (don’t throw those holes away—they make for delightful bites!).
Let the cut donuts rest for about 30 minutes, covering them lightly with a towel to avoid drafts.
Make the Vanilla Glaze
In a large bowl, whisk together the powdered sugar, hot water, vanilla paste or extract, and a pinch of fine sea salt until smooth and creamy. Adjust the consistency with more water if needed.
In a deep skillet or heavy-bottomed pot, heat the neutral oil over medium heat until it reaches 350°F (175°C). Fry the donuts in batches for about 1-2 minutes on each side, or until golden brown. Remove with a slotted spoon and let drain on paper towels.
Once cooled slightly, dip each donut into the glaze, ensuring an even coating. Place them on a wire rack to let the glaze set.
Variations & Creative Twists
Citrus Zest Glaze: Add a tablespoon of lemon or orange zest to your glaze for a zesty twist that’ll brighten up your donuts.
Chocolate Glaze: Replace half the powdered sugar in the glaze with cocoa powder for an indulgent chocolate finish.
Nutty Crunch: Top your donuts with crushed nuts or sprinkle them with cinnamon sugar before the glaze sets for a delightful surprise.
Seasonal Flavors: Experiment with different extracts, like almond or peppermint, during the glaze-making step to match your mood or the season.
Chef Emma’s Helpful Tips
Make-Ahead: You can prepare the donut dough the night before. Just let it rise in the fridge instead of at room temperature. It’ll be ready for frying in the morning!
Storage: Store any leftover donuts in an airtight container at room temperature for up to 2 days, or freeze for up to a month.
Perfect Frying: Keep an eye on the oil temperature. Too hot, and the outside will cook too quickly; too cool, and they won’t rise properly.
Cleanup: Use a coffee filter or a fine mesh strainer to strain out any bits of burnt donut from the oil before reusing it.
Nutrition Information per Serving
- Serving Size: 1 donut
- Calories: 250
- Carbohydrates: 35g
- Sugar: 18g
- Fat: 10g
- Protein: 2g
- Sodium: 190mg
Frequently Asked Questions
Can I make this ahead?
Absolutely! Prepare the dough the night before and let it rise in the fridge for fresh donuts in the morning.
Can I use different ingredients?
Yes! You can substitute the whole milk with a non-dairy milk or swap the butter for a vegan alternative.
How do I store leftovers?
Keep them in an airtight container at room temperature for up to 2 days, or freeze for up to a month.
How long does it last?
These donuts are best enjoyed fresh but can last for a couple of days on the countertop if stored properly.
Wrapping It Up
There’s something profoundly delicious about making Homemade Glazed Donuts from scratch. Not only do they offer a scrumptious treat, but they also create an experience, filling your home with warmth and wonderful aromas. I hope you take the time to recreate this cozy recipe and share sweet moments with the ones you love. Save this Homemade Glazed Donuts recipe to your Pinterest board so it’s ready when you need a delightful treat! Happy baking!