
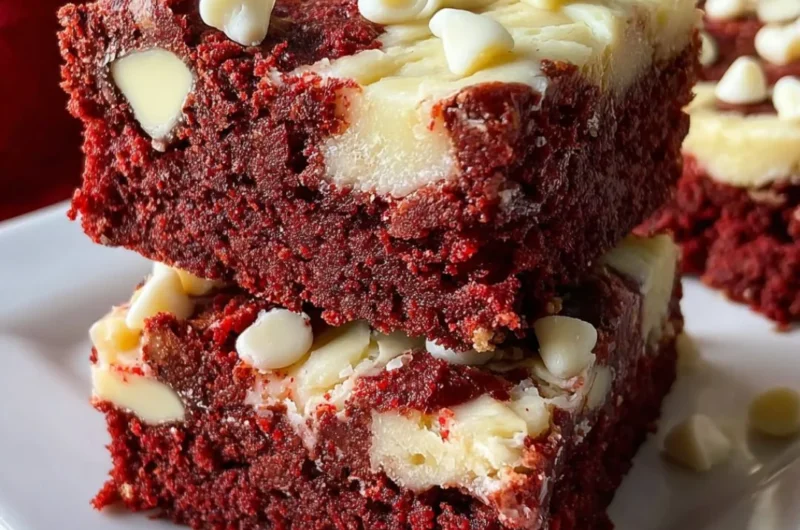
Red Velvet Cookie Bars: A Cozy Treat for Every Occasion
There’s something undeniably enchanting about the vibrant hue of red velvet. It transports me back to my childhood, where my grandma would whip up a batch of her famous red velvet cake for every family gathering. The rich aroma of freshly baked cookies always filled our cozy kitchen, each slice melting like a soft hug on our tongues. Today, I want to share with you a delightful twist on that nostalgic flavor—Red Velvet Cookie Bars! These bars are not only easy to make but are also a charming way to add a festive flair to your dessert table, especially during the chilly months. Plus, they are perfect for sharing with friends and family at holiday celebrations or cozy nights in. This is one you’ll definitely want to pin for later!
Why You’ll Love This Recipe
- Irresistibly Luscious: The combination of red velvet flavor and creamy white chocolate makes these cookie bars a showstopper dessert.
- Quick to Make: With simple steps involved, you’ll have these delicious bars ready in just about an hour!
- Perfectly Shareable: These cookie bars cut into neat squares, making them easy to serve at parties or to share with neighbors.
- Kid-Friendly Fun: Your little ones will love getting involved in the mixing and decorating process—great for family bonding.
- Versatile Year-Round: Whether it’s a special occasion or just a cozy treat on a rainy day, these bars are perfect for any time of year.
Ingredients You’ll Need for Red Velvet Cookie Bars
Gather These Simple Ingredients:
- 2 1/2 cups all-purpose flour
- 2 tablespoons cocoa powder
- 1 teaspoon baking soda
- 1/2 teaspoon salt
- 1 cup unsalted butter, softened
- 1 1/2 cups granulated sugar
- 1/2 cup brown sugar, packed
- 2 large eggs
- 2 teaspoons vanilla extract
- 1 tablespoon red food coloring
- 1 cup white chocolate chips
- 1 cup cream cheese frosting (store-bought or homemade, for topping)
Let’s Make It Together
- Preheat your oven to 350°F (175°C). Grease a 9×13 inch baking pan with butter or line it with parchment paper for easy removal.
- In a medium bowl, whisk together the flour, cocoa powder, baking soda, and salt. Set this mixture aside.
- In a large mixing bowl, cream together the softened butter, granulated sugar, and brown sugar until light and fluffy, about 3-4 minutes. The mixture should feel airy and delightful!
- Beat in the eggs one at a time, mixing well after each addition. Then, add the vanilla extract and red food coloring, mixing until everything is well combined—imagine that gorgeous hue coming to life!
- Gradually add the dry ingredients from the first bowl into the wet mixture, mixing until just combined. Be careful not to overmix, as a tender cookie bar is a must!
- Fold in the white chocolate chips gently with a spatula, ensuring they are evenly distributed throughout the dough—those pockets of creamy goodness are what you’ll treasure in every bite.
- Pour the cookie dough into the prepared baking pan and spread it out evenly using a spatula.
- Bake in the preheated oven for 25-30 minutes or until a toothpick inserted into the center comes out clean. The aroma wafting through your kitchen will be heavenly!
- Once baked, remove from the oven and allow the bars to cool in the pan for about 10-15 minutes. After cooling, transfer them to a wire rack to cool completely.
- Once cooled, spread the cream cheese frosting evenly on top of the cookie bars. This frosting is where your dessert transforms into creamy indulgence!
- Cut into squares and serve, or store in an airtight container at room temperature for enjoying later.
Delicious Variations to Try
- Chocolate Swirl: Add a few swirls of chocolate ganache on top of the frosting for a rich, decadent touch.
- Nutty Bliss: Fold in 1/2 cup of chopped pecans or walnuts into the cookie dough for a nutty crunch.
- Berry Goodness: Top the cream cheese frosting with fresh raspberries or strawberries for a fruity twist that adds a pop of color.
- Cookies & Cream: Mix in 1 cup of crushed Oreo cookies along with the white chocolate chips for an indulgent cookies and cream version!
Chef Emma’s Helpful Tips
- Make-Ahead Magic: You can prepare the cookie bars a day in advance; just frost them when you’re ready to serve for peak freshness.
- Ingredient Swaps: If you need a gluten-free option, you can use a 1:1 gluten-free flour mix, and they’ll still turn out delicious!
- Storage Suggestion: These cookie bars can be kept in an airtight container at room temperature for up to 4 days. If you want them to last longer, stick them in the fridge!
- Slicing Trick: For clean cuts, use a sharp knife dipped in warm water—wipe it down between slices for that perfect look!
Nutrition Information per Serving
- Serving Size: 1 square
- Calories: 220
- Carbohydrates: 28g
- Sugar: 17g
- Fat: 10g
- Protein: 2g
- Sodium: 100mg
Frequently Asked Questions
- Can I make this ahead? Yes! You can bake the bars a day in advance and frost them when you’re ready to serve.
- Can I use different ingredients? Absolutely! You can substitute the white chocolate chips with dark chocolate or even butterscotch chips for a twist.
- How do I store leftovers? Keep them in an airtight container at room temperature for up to 4 days.
- How long does it last? These cookie bars will maintain their delightful texture for about 4 days at room temperature or up to a week in the fridge.
A Cozy Closing Note
These Red Velvet Cookie Bars are truly a magical treat, bursting with warm, nostalgic flavors and creamy sweetness. They are perfect for brightening up any gathering or simply enjoying with a steaming cup of cocoa. I hope you love making and sharing these as much as I do! Save this Red Velvet Cookie Bars recipe to your Pinterest board so it’s ready when you need a cozy treat!